Most likely some of the dishes on the menu call for chicken stock. Of course, you can purchase this ingredient at the store, but trust me when I say using homemade chicken stock will taste better. The better quality your ingredients, the better your food will taste! I make chicken stock year-round and freeze it in old peanut butter or pasta sauce jars (and sometimes Ziplock bags).
It's also a great way to keep meal prep costs down, and the ultimate in getting everything you can from your chicken! All you need is chicken bones and some veggies - I'll even freeze the bones if I don't have time at the moment to make the stock. No cooking skills needed, see how easy it is:
Homemade Chicken Stock
bones from one chicken (I have used both pre-cooked chickens and friar packs)
2 large carrots, chopped
2-3 stocks celery, chopped (OK to use the leafy top of the celery)
1 medium onion, chopped
2-3 cloves garlic, halved
herbs, dried or fresh (basil, oregano, thyme, Italian seasoning - whatever you have on hand)
kosher salt & pepper
1. Remove as much skin from the bones as possible - meat still on the bones is okay, it'll add flavor! Rough chop vegetables - large or medium pieces are fine; for the celery, I chopped the entire bunch down a few inches, including leafy tops. If spices are dried, put in a tea ball or tie up in cheesecloth; about 1-2 teaspoons each for 2 tablespoons total. If fresh/dried on stems, use 2 sprigs each, whole.
2. Place chicken bones, all vegetables and herbs in the pot, sprinkle generously with kosher salt and fresh cracked pepper.
 3. Add water until all ingredients are covered.
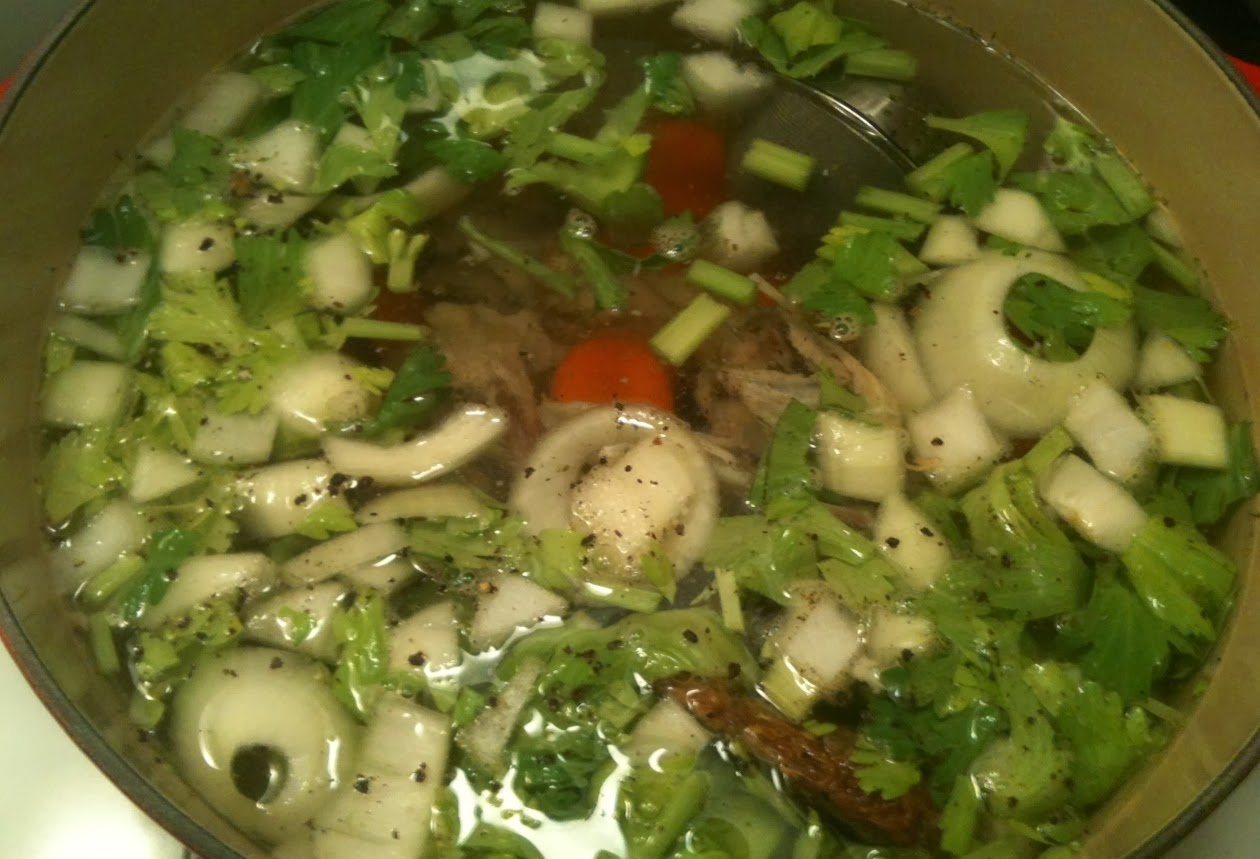

5. Let cool, then strain out all bones and vegetables. Use broth or freeze within three days. Keep refrigerated.
Makes about 8 cups broth.
Note: If freezing, leave room for broth to expand. I fill the jars, freeze, and then add the lids once the liquid has finished expanding. For an even richer, more flavorful broth, roast vegetables before simmering - this of course would take a little longer, but I'm definitely going to try it!
Enjoy!
hi Kate :) I make homemade broth all the time too...when Johnny comes home for dinner, I COUNT on this broth-he is allergic to onions and garlic, and every kind of broth you buy in the store has onions and garlic in it...
ReplyDeleteThat's one of the best parts about making your own - you can tailor it to your own tastes and dietary needs!
ReplyDeleteMy son makes his own all the time and I keep vowing to find the extra time in a day to do it! Glad to see you're back on the blogging, Kate!
ReplyDeleteThe great thing is you don't even have to be in the kitchen the whole time, just at home! Thanks - glad to be back :)
ReplyDelete