Pumpkin Chocolate Chip Cookies

These are a recipe I created five or six years ago that have become a regular during the fall and winter months. While pumpkin and chocolate might not naturally come to mind as a combination, they work really well together in a cookie!  Oh, did I mention that they're low-fat?


I came up with the recipe when I purchased some pumpkin chocolate chip cookies from a bakery that I thought were tasty. I said to myself, "Hey, I could make these!"  I'd heard of substituting butter with applesauce in baking to reduce fat, and figured that canned pumpkin was about the same consistency as applesauce so it would probably work the same.  The cookies are a bit more cake-like than a traditional chocolate chip cookie, but equally satisfying and just as hard to stop eating!  To make an even healthier cookie (and still tasty), use your favorite oatmeal cookie recipe but use only 3T of butter and 1 cup of pumpkin puree (and the spices).

Notes: because they are more cake-like and have less fat, they don't store well in air-tight containers; neither do they look as nice when they are a few days old - so don't make well in advance if you're serving them to guests!  Extra pumpkin can be frozen until your next pumpkin recipe!

Pumpkin Chocolate Chip Cookies
3 T butter, softened
1 cup pumpkin puree
1 cup light brown sugar, packed
1/2 cup white sugar
2 eggs
2 tsp. vanilla
2 1/2 cups flour
1 tsp kosher salt
1 tsp baking soda
1/2 tsp cinnamon
pinch ground cloves
pinch nutmeg
pinch allspice
12 oz. semi-sweet chocolate chips

1.  In an electric mixer, combine butter, pumpkin, sugars, eggs and vanilla until well blended.

2.  In another bowl, combine the flour, salt, baking soda and spices and mix together (I use a whisk).  With the mix on low, add the flour mixture to the pumpkin  mixture until just combined.  Add the chocolate chips and mix until chocolate chips are just incorporated.

3.  Spoon cookies onto a cookie sheet and bake at 375 for about 11 minutes.  Be sure to bake until cookies spring to the touch and peaks are just starting to turn golden.  You definitely don't want them to be undercooked since they are cake-like!

Enjoy!

Peppermint Bark

I'm not a crafty person.  I don't particularly enjoy crafting, and I'm not very good at it when I do attempt a project.  So it's not much of a surprise that as of yet, my only successful home-made Christmas presents this year are the ones made in the kitchen.  While it does remain a mystery as to why I decided to attempt these crafty projects in the first place, I can't seem to give up on them - which means I can't say what they are until they are a complete fail. The fact that Christmas is less than two weeks away? Well, let's just say that I might be making massive doses of Peppermint Bark on Christmas Eve...


But, since my kitchen creation was a complete success, I am delighted to share my own Peppermint Bark recipe with you!!  Like my crafts, I had no recipe, just an idea in my head that I was hoping would work.  I think next year I'll stick to the kitchen since it takes a lot less time and I am a lot more successful.

This is such a simple recipe and can be made in a quick slab form or you can get creative and use cookie cutters as molds. (This recipe would also lend itself well for girly baby showers or for Valentine's Day treats - just don't use Christmas cookie cutters or candy cane bits on top!)  They make such a fun, festive presentation!


Ingredients
1/2 lb. good white chocolate - or slightly less is okay (I use Callebaut)
1/2 lb. good semi-sweet chocolate (I use Callebaut)
2.5 oz. Andes Peppermint Crunch Baking Chips (or Peppermint Crunch bars, chopped (1/2 box)
1 to 2 candy canes, chopped

1.  If using cookie cutters, grease with cooking spray and place on wax paper.  Melt semi-sweet chocolate in double boiler (glass bowl over pot of simmering water, be sure bowl is not touching water) or in a microwavable bowl in 30 second increments, stirring every 30 seconds (about 2 minutes total).  When chocolate is completely melted, stir well and spoon a thin layer (about 1/4 inch) into molds or spread a thin layer onto wax paper. A toothpick is great for getting the chocolate into the edges of a cookie cutter.  It's helpful to have the wax paper on a cookie sheet so you can pop chocolate into the refrigerator to cool while you prepare the rest of the ingredients.

2.  Melt white chocolate and Andes mints, together, using the same method as in step one and spread/spoon on top of the firm, semi-sweet chocolate.  Top with candy cane pieces while still warm.  Allow to cool and harden on the counter or you may cool in the refrigerator.

3.  Break the slabs of peppermint bark apart for serving.  To get the peppermint bark out of the cookie cutters, carefully push them from the bottom (semi-sweet side).  This will prevent the darker chocolate from smearing onto the pink - if your cookie cutters bend onto the inside on the top rim, you'll have to push from the top down.  You may need to take a sharp knife to trim some of the edges down or to scrape some of the edges off where the chocolate may have bled to make the pieces more attractive.  It's good to cover your fingers with a plastic sandwich baggie so you don't get chocolate smudges on the pink chocolate while handling/pushing the peppermint bark!

Enjoy!

Peanut Butterfinger Cookies

This is likely to be about as close to a recipe with nuts as you'll ever find on this blog (with the exception of if I ever find that pistachio biscotti recipe I made years ago)!  I'm not a big fan of nuts. Okay, I'll be honest - I don't like nuts.  And there are even a few to which I am allergic.  But I gotta say that peanut butter mixed with butter and sugar isn't all that bad!


These are a fun twist on the classic peanut butter cookie that kids and grownups alike will enjoy.  Even without the candy I think this would be a little different than your run-of-the-mill peanut butter cookie; of course, I don't eat peanut butter cookies very often, so you'll have to try it yourself and let me know how you think it compares!

Ingredients
5 Butterfinger bars, roughly chopped
1 cup unsalted butter, softened
2/3 cup creamy peanut butter
1 cup sugar
1 cup brown sugar
2 eggs
2 tsp. pure vanilla extract
2 2/3 cup flour
1 tsp. kosher salt
2 tsp. baking soda

1.  Cream butter, peanut butter and sugars together.  Add eggs and vanilla and mix until well blended.

2.  In a separate bowl, combine flour, salt and soda.  Add to the butter mixture until just combined.  Add the chopped Butterfinger pieces and mix until fully incorporated into batter.

3.  Bake at 350 for about 10 minutes until cookies are golden brown.  Let sit on pan briefly and remove to a wire rack.  Do not let cookies sit on pan for too long - cooling candy pieces will stick to the pan and make the cookies hard to remove! 

Enjoy!

Cranberry Relish

There is only one dish that I have to have at Thanksgiving and Christmas: cranberry sauce.  But not just any cranberry sauce. Aunt Selma's Cranberry Relish.  Yes, the very same Aunt Selma who gave us the wonderful Apple Cake recipe; I've come to the conclusion that she must have been a very good cook.  This is definitely not your average cranberry sauce; it's not the shape of an aluminum can, it doesn't have orange rind in it, and it's not plain cranberries and sugar.  It has the zip of a fresh orange and gets sweetness from dried plums.  In a word, it's delectable.  And it's been a staple on our family table for as long as I can remember for every Thanksgiving and Christmas meal.  I also like that it's quick, simple to make, and can be made a week in advance - which is great when you're trying to make what feels like a million different dishes for a big holiday meal. 


Cranberry Relish
1 pound dried plums, roughly chopped
1 orange, peel and membrane removed, chopped
1 tsp. lemon juice
1 1/2 cups sugar
1 1/2 cups water
3 cups cranberries

1.  Chop dried plums and set aside. Slice peel and membrane off one orange and slice the meat of the orange into small bite-size pieces (the pieces will remain intact in the sauce, so keep that in mind when you decide how large you want them). Set aside.


2.  Put water and sugar in a medium sauce pan on the stove and boil for 5 minutes.


3.  Add cranberries and bring to a boil.  Boil cranberries until all berries are popped.  It's important that all berries are popped; any un-popped berries in the sauce will be very tart when eaten!  You can smoosh berries with a rubber spatula after a few minutes to see if any still need to pop.


4.  When all berries are popped, add fruit mixture and lemon juice to the cranberries and bring to a boil. Remove from heat.  Sauce will thicken as it sits. If you find your orange pieces are larger than you like, simply take some clean kitchen shears and snip them into smaller pieces in the sauce (it's much easier and quicker than taking them out to cut them!).

Serve warm or store in the refrigerator until ready to eat. May serve cold or at room temperature. After removing from heat, you may can the sauce if desired.

Enjoy!

Chicken Tortellini Soup

Everyone always likes their mother's recipes,* and I'm no exception.  Now, that's not to say that you shouldn't try new things or that there's never room for improvement; I love trying new foods!  But, chicken noodle soup is one food I've yet to find a replacement I prefer to my mom's.  Maybe it's because hers was so simple that, to me, all these chicken soups with lots of vegetables just don't seem right. Carrots don't belong in chicken noodle soup.  Is it called Chicken Carrot Noodle Soup? No. Not a carrot in the title - for a reason, I say! 

Originally my mom made this soup with Klusky extra-wide egg noodles.  Why she specified Klusky, I don't know.  I guess I could ask, but it never occurred to me; it's just how Mom did it.  One day she substituted cheese tortellini and we've rarely gone back to the egg noodles.  The tortellini are a wonderful twist on the classic (see, we do change things up around here!).  They add some extra flavor and I just love the chewy pasta aspect.  What's better on a cold fall day than a hot bowl of chicken noodle soup?


Chicken Tortellini Soup
2 T olive oil or butter
1 cup chicken breast, diced
1 c. sliced celery
1/4 - 1/2 c. onion, diced
1 can cream of chicken soup (low sodium ok)
32 oz. chicken broth (low sodium ok)
salt & pepper to taste
1/2 tsp. sage or poultry seasoning
1 - 8oz package cheese tortellini

1.  Heat 2 tablespoons olive oil in a soup pot on medium. Cook chicken in olive oil with a sprinkle of salt and pepper. When chicken is cooked through, add celery, onion and sage and saute for about two minutes, until onion is translucent and soft.

2.  Add chicken broth and cream of chicken soup.  If cream of chicken soup is condensed, add water as instructed on can. Add tortellini at this time as well. If using egg noodles, use 2 cups of noodles.

3.  Bring soup to a boil, reduce heat and simmer on low until pasta is cooked. Stir in salt and pepper to taste.  If soup is thick, add water or chicken broth to thin to desired thickness.  Leftovers will thicken; add water or chicken broth to thin.

Enjoy!

* I fully understand that not everyone grew up with a mother who was a good cook, in which case you may not prefer any of your mother's recipes. If that's your case, may you find this blog helpful!

Apple Cake

A true family recipe, handed down from generation to generation; I'm at least the third generation to continue the tradition of making apple cake.  The recipe originated in our family from Aunt Selma, an adopted 'aunt' (and Uncle Harry, of course) of my mother's who had no children of her own who adopted my mother and her four siblings as her own extended family.  Aunt Selma and Uncle Harry were included in all of my mother's family gatherings, and I like to imagine this cake was frequently there as well.  It's a very simple cake to make, and pretty quick prep as well.  While it's doesn't look too fancy, it tastes amazing; my friends have frequently asked for the recipe over the years and I am happy to be able to continue the tradition of passing on Aunt Selma's apple cake.  Did I mention it has a caramel frosting?


Apple Cake
Put in a large bowl (electric mixer) and mix until well blended:
2 1/3 c. flour
2 c. sugar
2 tsp. baking soda
3/4 tsp. salt
1 tsp. cinnamon
1/4 tsp. clove
1/4 tsp. nutmeg


 Add to above mix and blend on medium speed:
4-5 c. chopped, peeled apples (usually 4 large apples)
1/2 c. soft butter
1/2 c. chopped walnut (optional - I never use!)
2 eggs

Note:
  • The dough seems very dry at first when you add the apples, but don't worry, the apples quickly juice out and the dough becomes very wet.
  • Be sure to butter and flour the pan (esp. if using a Bundt pan); this cake has a tendency to stick.
  • If using a Bundt pan, allow cake to cool in pan for a few minutes, then tip cake out and cool completely on a wire rack before frosting.
Bake at 325. 9x13 = 45 min. Bundt pan = 60 min. (until a tester comes out clean)

Caramel Frosting
In a small pan on a stove:
1/3 c. melted butter
add 1/2 c. brown sugar, melt.
add a dash salt and 3 T milk.
Boil. Cool 10 minutes.
Add 1 1/2 c. confectioners sugar and 1/2 tsp. vanilla
Beat with a spoon until smooth.
Add small amounts of confectioners sugar with sifter to thicken, if needed. You don't want it to be so thin it runs off the cake, or so thick it won't drip down the sides a little bit (if using a Bundt pan).
Spread over cake.

 
Enjoy!

Orange Chocolate Chunk Cake

I wasn't sure whether to put the chocolate or the orange first in the name of this post. Between the chocolate ganache flowing down the sides and the chocolate chunks inside, you can't help but have chocolate on your mind after the last bite is gone.  But then there is the orange zest in the cake itself that is so fresh, and the orange juice in the glaze that peeks out in a sneaky little way.  Then I remembered that I was stealing the recipe from Ina Garten (again, I know) so I better stick with her name for it, and it made my decision easy.


Last Monday was Halloween and as I flipped through my cookbooks I came upon this recipe. I thought it very festive and the perfect recipe to try for the holiday being that it was orange and brown (which when it comes to cooking, is close enough to black!) It was amazingly delicious and was sliced up and whisked away rather quickly by my co-workers (nothing like job security through food).

This would make a great Autumn dessert, whether for Thanksgiving, a dinner party, or a casual Sunday football party.

Orange Chocolate Chunk Cake
1 c unsalted butter at room temperature
2 c sugar
4 eggs at room temperature
1/4 c grated orange zest (2 large oranges)
3 c flour plus 2 T
1/2 tsp. baking powder
1/2 tsp. baking soda
1 tsp. kosher salt
1/4 c fresh squeezed orange juice
3/4 c buttermilk at room temperature
1 tsp. pure vanilla extract
2 cups good semi-sweet chocolate chunks (I used Ghiradelli chocolate chips)

For the Syrup
1/4 c sugar
1/4 c freshly squeezed orange juice

For the Ganache
8 oz. good semisweet chocolate chips (I used Ghiradelli chocolate chips)
1/2 c heavy cream
1 tsp. instant coffee granules (I used Starbucks Via)


1.  Preheat the oven to 350 degrees. Grease and flour a 10-inch bundt pan.

2.  Cream the butter and sugar in a mixer until light and fluffy, about 10 minutes. Add eggs, one at a time, and then add the orange zest. (When zesting, be sure to grate only the orange part, not the white underneath!)

3.  In a separate bowl, combine the 3 cups flour, baking powder, baking soda, and salt (I stir with a whisk to combine).

4.  In a third, smaller bowl, combine the buttermilk, orange juice and vanilla. (something with a spout would be helpful in this case)

5.  Add the flour mixture (in fourths) and buttermilk mixture (in thirds), alternately to the creamed butter, beginning and ending with the flour mixture.

6.  Toss the chocolate chips with 2 tablespoons of flour and add to the batter.  Pour batter into the prepared pan, smooth the top, and bake for 45 - 60 minutes, until a cake tester comes out clean. Let the cake cool in the pan on a wire rack for 10 minutes.

7.  While the cake is cooling in the pan, heat the sugar and the orange juice in a small pan on the stove over medium-low heat until the sugar dissolves to make the syrup.

8.  Remove the cake from the pan and set it on a wire rack and spoon the orange syrup over the cake. For easy clean up, place a sheet of wax paper under the wire rack before spooning the syrup over the cake - it will catch any dripping syrup!  Allow the cake to then cool completely.

9.  Once the cake is cooled completely, make the ganache in a double boiler (a glass bowl placed on top of a pot of simmer water - be sure the bowl does not touch the water!) Melt the chocolate, heavy cream and coffee in the double boiler until smooth and warm, stirring occasionally.  Drizzle over the top of the cake.

Enjoy!!


Southwestern Corn Chowder

I've been waiting months for the leaves to turn bright shades of yellow, orange and red; for the air to have a crisp chill; for the boots and sweaters to come out of boxes.  Why?  So I can make one of my all-time favorite soups and share it with you!!  Southwestern Corn Chowder is an easy, go-to soup that I make frequently during throughout the fall and winter that is always a hit when I serve it to company.
 
I admit that I'm a sucker for creamy chowders, but they are definitely not friendly for a healthy diet.  And I know that I haven't exactly been posting recipes that represent a balanced diet (of course, desserts are much more fun to eat, so who can blame me?!?), but that's one reason I love this soup; it's the taste of a creamy chowder without the fat.  What's not to love?  The original recipe came from a Cooking Light magazine, but I've made my own adaptations to create the recipe you see here today.


Southwestern Corn Chowder

1 T butter
1 scallion, white and green parts separated, thinly sliced
1 medium carrot, halved lengthwise, thinly sliced
1/2 tsp. chili powder (or more if you like it spicy!)
1/2 tsp. dried oregano
coarse salt & ground pepper to taste
1 baking potato, peeled and cut into 1/2 inch pieces
1 package (1 pound) frozen corn kernels (or even even a little more if you like it really corny)
1 can (14.5oz) reduced sodium chicken broth
1 cup milk (I'll often substitute a little fat-free half-and-half to thicken the soup if I have it on hand)

1. Melt butter over medium heat; add white scallion, carrot, chili powder and oregano.  Season with salt and pepper. Cook, stirring occasionally, until scallion is soft (2 minutes).

2.  Add potato, corn, broth and milk.  Bring to a boil and reduce to a simmer.  Cook until potato is soft (15-20 minutes).  Stir in green scallion, season with salt and pepper to taste.

Serves 3-4, depending on portions!  Enjoy!!

Chocolate & Orange Shortbread Cookies

Today I am excited to unveil a Delectable Cate original recipe!! Chocolate & Orange Shortbread Cookies is a creation of my very own that I hope you enjoy as much as my family and co-workers have (yet again, they have kindly agreed to be my taste testers!).  These make such a pretty and festive cookie - a perfect fall cookie, both in taste and look.


In my attempt to be better at posting recipes, I've been trying to spend more time in the kitchen lately, and therefore attempting to come up with fabulous dishes/desserts.  This particular idea was niggling away in the back of my mind over the week and this weekend I just had to try it.  I'm pretty pleased with how it turned out; the only thing I might work on is the dipping chocolate.  I used semi-sweet chocolate chips and it was rather thick.  I'm wondering if I used an actual chocolate if it might melt into something a little smoother and thinner, thus creating something you could either drizzle or dip easier.  It's something to try.  But, if chocolate chips are what you have on hand, they work and still taste good.

Chocolate & Orange Shortbread Cookies

1-1/2 cups unsalted butter, room temperature
1 cup sugar, plus extra for sprinkling
1 tsp. pure vanilla extract
1-1/2 cups flour
1/4 tsp. salt
6 - 7 oz. semi sweet chocolate, finely chopped
plus 1/2 cup semi sweet chocolate, finely chopped
1 T orange peel, finely grated (zest of about a whole orange)


1.  In the bowl of an electric mixer, mix the butter and 1 cup sugar until just combined. Add vanilla.  In a separate bowl, mix flour and salt, then add the flour mixture to the butter mixture and mix on low speed until the dough starts to come together.

2. Grate zest of one orange and set zest aside momentarily. Chop 1/2 cup of semi-sweet chocolate into small pieces. Holding the blade of the knife at about 45 degrees to the cutting board, run the knife lightly over the chopped chocolate to separate the larger pieces from the powdery chocolate that results from the chopping.  Try to pick up the pieces, leaving behind as much powder as possible, and add to the dough.  This will prevent the dough from turning brown from the chocolate powder.  Add the orange zest as well.  Turn the mixer back on and mix until just incorporated.

3.  Dump the dough onto a floured surface and shape into a flat disk.  Wrap in plastic wrap and chill for 30 minutes. (Do not chill for longer or it will be too cold to roll out!)


4.  Preheat the oven to 350.  Roll the dough out to 1/2 inch thick and cut with either a finger cutter (3x1") or a round cutter (about 2" diameter). Be aware that cookies will expand so don't place too close together.  Place cookies on an ungreased cookie sheet and sprinkle lightly with sugar.  Bake for 20-25 minutes (always check at 18 minutes to be safe!) until edges just begin to brown.  I found that each batch finished a few minutes earlier than the previous one as the dough warmed up from being chilled.  Remove from pan immediately and cool completely on a cooling rack.

5.  Once cooled, place cookies on a baking sheet lined with parchment paper.

6.  Put 3 ounces of chocolate in a glass bowl and microwave on high for 30 seconds. Stir with a wooden spoon. Continue to heat and stir in 30-second increments until the chocolate is just melted.  Add the remaining chocolate and allow to sit at room temperature, stirring often, until it's completely smooth.  Stir vigorously until the chocolate is smooth and slightly cooled; stirring makes it glossier.

7.  Drizzle/dip half of each cookie with just enough chocolate to coat it.  Allow to sit until chocolate hardens (although you might have to sample one for quality control!).

Makes about 3 dozen cookies (if you re-roll out your scraps!)  Enjoy!

Peach Plum Raspberry Crostata

I love my cookbooks.  When separated from them, I find myself thinking of a recipe I'd like to make which is undoubtedly followed by a sigh and an, "Oh yes, it's in that cookbook I don't have with me."  Of course, our happy reunion is always followed by baking or cooking.  This time I decided to bake a recipe I've been wanting to try for a long time - the Summer Fruit Crostata in Barefoot Contessa's At Home cookbook (p. 203). 


It was the perfect recipe to end summer and with which to begin fall; fresh and sweet with a touch of tartness all wrapped up in a flaky crust.  It would be amazing served with a scoop of vanilla ice cream, too!  It's also much easier and less 'fussy' than a normal pie because it doesn't use a pie plate, you simply bake it on a cookie sheet and wrap the edges of the crust up over the fruit - no crimping necessary (which is good for me, because I can't crimp a pie crust to save my life!).

My recipe differs from Ina Garten's in that I substituted raspberries for her blueberries.  It worked great and I'd do it again in a heartbeat.  There was a lot of juice left in the bowl after mixing all the fruit and orange juice together, so I'd use a slotted spoon and try to leave as much juice behind when scooping the fruit into the crust - it juices out quite a bit even with leaving juice behind!


Peach Plum Raspberry Crostata

For the Pastry (makes 2 crostatas - freeze one if you're only making one crostata)
2 cups all-purpose flour
1/4 cup granulated or superfine sugar
1/2 tsp. kosher salt
1/2 pound (2 sticks) cold, unsalted butter, diced
6 T ice water

1. Mix flour, sugar and salt in a bowl.  Add cold, diced butter and quickly (and carefully!) toss with your fingers to coat cubes with the flour mixture.

2.  Using a pastry cutter, cut butter into flour mixture until mixture is well combined (will be thick).  Add the ice water, a few tablespoons at a time and mix in completely with the pastry cutter, until the all six tablespoons are well-incorporated.  Be careful not to overmix the pastry so it will stay light and fluffy!

3.  Turn the dough onto a well-floured board, roll it into a ball, cut it in half, and form it into two flat disks. Wrap the disks in plastic and refrigerate for at least an hour. If you only need one, freeze the second.

4. Preheat the oven to 450 degrees. Line a sheet pan with parchment paper.

5.  Roll the pastry into an 11-inch circle on a lightly floured surface.  Transfer it to the sheet pan.

For the Filling (makes 1 crostata)
1 pound firm, ripe peaches, peeled
1/2 pound firm, ripe black plums, unpeeled
1/2 pint fresh raspberries
1 T all-purpose flour
    plus 1/4 cup flour
1 T granulated sugar
    plus 1/4 cup sugar
1/4 tsp. grated orange zest
2 T. freshly squeezed orange juice
1/4 tsp. kosher salt
4 T. (1/2 stick) cold unsalted butter, diced

1.  For the filling, cut the peaches and plums in wedges and place them in a bowl with the raspberries. Toss them with 1 tablespoon of the flour, 1 tablespoon of the sugar, the orange zest and the orange juice. (to make the peaches easier to peel, dip them in boiling water for 30 seconds, then immediately submerge them in cold water, and then peel)

2.  Place the mixed fruit on the dough circle, leaving a 1-1/2 inch border.

3.  Mix the 1/4 cup flour, the 1/4 cup sugar,  and the salt in a bowl.  Add the four tablespoons cold, diced butter and mix with a pastry cutter until the mixture is crumbly.  Sprinkle evenly over the fruit.

4.  Gently fold the border of the pastry over the fruit, pleating it to make an edge.

5.  Bake the crostata for 20 - 25 minutes, until the crust is golden and the fruit is tender.  Let the crostata cool for 5 minutes, then use two large spatulas to transfer it to a wire rack (if it juiced over while cooking, it may be easier to slide the crostata, while still on the parchment paper, to the wire rack and remove from the parchment paper once cool).  Serve warm or at room termperature.

Serves 6.  Enjoy!

Snickerdoodles

Who can resist snickerdoodles?  Who can resist smiling when they say the name? :)  I've yet to meet someone who doesn't like a snickerdoodle.  It's a humble little cookie that you don't see very often, but everyone gets excited when you bring them and you hear lots of, "Oh, I love snickerdoodles!" (and of course they smile, because who can resist smiling when you say 'snickerdoodle?')


I'm not sure where this particular recipe came from, but it's the recipe I got from my mom in one of those typical college phone conversations, "Hey Mom, what's your recipe for snickderdoodles <insert smile>?" I still have the Post-It note I wrote it on all those years ago.  I'm not sure how it compares to other snickerdoodle recipes because I've never even looked up other recipes.  Why try something new when this one is so good?!?


Snickerdoodles
1/2 cup soft butter
1/2 cup shortening (butter flavored)
1 1/2 cups sugar
2 eggs
2 3/4 cups flour
2 tsp. cream of tartar
1 tsp. baking soda

coating
2 T sugar
2 tsp. cinnamon

1. Beat butter, shortening, sugar, and eggs until fluffy. Add dry ingredients.

2. Shape dough by rounded teaspoons into balls and roll in cinnamon-sugar,  coating completely.

3. Place 2-inches apart on ungreased baking sheet.

4. Bake at 350 degrees, 8-10 minutes (or until set)

5. Remove immediately from sheets when done baking.

Makes about 6 dozen.  Enjoy!

Coconut Macaroons

I admit, it's been awhile since my last post - too long.  I've even received complaints about the fact that it's been so long since I've posted anything.  To make it up to you, I'm going to post twice this weekend. One (this one), a new cookie recipe and an oldie-but-goody cookie recipe for you.

This particular cookie recipe is one reason it's taken me so long to post.  I got the crazy idea a few weeks back that I wanted to come up with the best coconut macaroon recipe and post it here.  Well, five batches of coconut macaroons later, here's what I've come up with.  I think my friends, family and co-workers were pretty happy I took this quest on, and didn't mind being my guinea pigs for this one.

My first three recipes I found online; a Barefoot Contessa classic (which I also found on other reputable cooking websites, not attributed to her), an Epicurious.com recipe, and an Alton Brown recipe.  Unfortunately for poor Mr. Brown, his cookies were thrown out (I didn't want to put everyone through the misery of testing them) but I did keep one aspect of his recipe that made it through to the winning batch - toasted coconut. 

I also created two recipes using various elements of other recipes and ideas of my own (one recipe included coconut cream!).  While the first recipe I created didn't even place in the top three, I am very proud to announce that, three bags of coconut, 8+ egg whites, 2 cans of sweetened condensed milk, one box of coconut cream, and multiple various other ingredients later, recipe number five, my twist on Barefoot Contessa's classic Coconut Macaroon (which did come in second), is the winner! 


Best Coconut Macaroons

14 oz. sweetened shredded coconut, divided
14 oz. sweetened condensed milk
1 tsp. pure vanilla extract
2 egg whites
1/4 tsp. salt

1. Preheat oven to 325 degrees.

2. Line baking sheet with parchment paper. Spread 1/2 of coconut out evenly over parchment paper and toast about 10 minutes in oven - check every 5 minutes, more frequently as it starts to turn golden.  If edges are toasting before the middle, remove pan from oven and mix coconut, spread back out; return to oven and continue toasting until coconut is mostly golden brown. Be careful not to burn it! (Burned coconut smells bad and requires starting over, which, unless you purchased extra, usually means another trip to the store for a second bag - not that I would know...)

3. Mix toasted and untoasted coconut, sweetened condensed milk and vanilla in a large mixing bowl.

4.  Put egg whites and salt in a mixer fitted with the whisk attachment. Whisk on high until stiff peaks form. (test by stopping the mixer and lifting the attachment - a peak will form on the end of attachment as it lifts.)

5. Gently fold egg whites in with coconut mixture until well incorporated.

6. Scoop macaroon dough onto cookie sheets lined with parchment paper in mounds just under two inches. Bake for 20-30 minutes. Careful not to overcook (the ones pictured here are slightly over-cooked, but that's how my dad likes them!)

Makes about 25 macaroons. 

Enjoy!

Guacamole

Summer wouldn't be complete without making guacamole.  I'm not talking about a green paste you squeeze out of a bag, or scoop out of a tub, or mix with a powder.  This is the real thing.  Fresh ingredients, lovinginly (or at least carefully) hand-chopped that make something so delicious you will never be able to truly enjoy something from a bag or tub again.  I warn you: if you don't want to stop eating guacamole from a powder mix, then don't try this recipe.

My grandfather has been making this recipe for as long as I can remember.  He likes things spicy, so he adds about 5 or 6 extra jalapenos (okay, maybe not that many) when us wimpy kids aren't around. My dad has also become a master guacamole maker, so I ask him for tips as I am learning to perfect the recipe.  It's a bit of a taste-it-and-add-a-little-more-of-this-or-that-to-suit-your-tastes type of recipe, so feel free to tweek it - especially when it comes to how spicy you like it!

If you would like to do the prep work a day ahead of time, all the ingredients can be chopped and mixed together and covered the day before you plan to serve the guacamole except the avocado and tomatoes.  The day of, just dice up the avocado and tomatoes and add them to the vegetable mix and you're ready to go! 


Guacamole
4-5 ripe avocados
2 seeded and finely diced plum tomatoes
3 green onions, finely sliced
2 large cloves garlic, minced
2 anaheim peppers, seeded and veined, minced
1 jalapeno pepper, seeded and veined, minced
1/2 serrano pepper, seeded and veined, minced
3/4 bunch cilantro, chopped
juice of 2-3 limes
salt to taste, about 1/2 - 1 tsp.

1.  Dice and seed the tomatoes. It's important to seed the tomatoes or the guacamole will be runny. Put in a medium size bowl.


2.  Finely slice the the green onions and mince the garlic. Add all to the bowl.

3.  Vein, seed and finely dice all peppers, making sure to finely dice the serrano (a little bit spicier than a jalapeno) and the jalapeno - they are spicy and you don't want someone to get too big of a piece in their guacamole!  The anaheim peppers are not spicy, just flavorful! Add all peppers to the bowl.

4.  Before chopping cilantro, use the blade of the knife to roughly slice the leaves off the stems as much as possible.  Take off about 3/4 of the leaves off the bunch, and then finely chop the leaves. Add to the bowl.


5.  Dice the avocados and add to the bowl.  It's important to do this at the end so they maintain their bright green color. Avocados can brown easily once sliced; the lime juice, added next, will help them stay bright green.

6.  Juice 3 limes.  Pour 2/3 of the juice into the bowl.  Add a dash or two of salt and mix all ingredients together.  Taste the guacamole and add more lime juice and salt if necessary until it reaches the desired taste (careful not to add so much lime juice as to make the guacamole too runny!). You may find that you'd also like to add more spice - feel free to dice up some more serrano or jalapeno to do this!

I like to enjoy guacamole with chips - but it is also tasty with burgers, pita chips, or just about anything, really.  It also pairs most deliciously with a margarita, another summer essential.

Makes about 4 cups of guacamole.  Enjoy!

Coconut Cake

Coconut is, without question, one of God's gifts to man. Cake is, without question, one of man's gifts to man. Combined, you come about as close as possible to heaven on earth. I love coconut cake. I have made my fair share of coconut cakes over the past few years. Come to think of it, I'm pretty sure every single one has been for a birthday, whether for mine or for someone else. Coconut cake just looks festive. This time around, I hit the jackpot. It was the best coconut cake I've ever had - including cakes made by me and cakes made by others.

The frosting is an heirloom recipe passed down from my grandmother and it is great for just about anything you want to frost. I'd highly recommend copying it down and adding it to your frosting repertoire. I'm sure you'll love it - you can always add in a drop or two of almond, orange or mint extract to switch up the flavor depending on the baked good with which it is being paired.

Coconut Cake

1 cup unsalted butter, room temperature
1 cup sugar
3 large eggs
2 cups all-purpose flour
1 tsp. baking soda
2 tsp. baking powder
1 tsp. salt
1 cup sour cream
2 T vanilla extract
3/4 sweetened shredded coconut

1. Preheat oven to 350 degrees. Butter and flour a bundt cake pan.

2. Cream the butter and sugar together until light and fluffy. Add the eggs one at a time, blending well after each addition.

3. Mix the dry ingredients together. Then add to the butter mixture, mixing well. Add the sour cream and mix well; then mix in the vanilla. Last, mix in the coconut until just incorporated. Batter will be thick.

4. Pour batter into prepared pan and bake for 40 - 45 minutes, or until golden. Let pan cool on wire rack for 5 minues, then turn cake out of pan. Leave the cake to cool on rack completely. Frost with vanilla buttercream frosting (recipe below) and sprinkle generously all sides with more coconut until completely covered (it's a messy job, but someone's gotta do it).


Grammy's Buttercream Frosting

1 stick butter, must be room temperature
1 pound powdered sugar
1/2 tsp. vanilla extract
2 T milk

You'll need an electric mixer for this one - it's far too strenuous to do by hand! Start out by beating the butter.  Add half of the sugar. Keep beating it. Add the vanilla extract and a few drops of the milk.  Add in the rest of the sugar.  Dribble in the milk, a few drops at a time, until it reaches the right consistency. The frosting only gets creamier and better the longer you beat it; my mom even recommends walking away from the mixer for five minutes. Remember: you can always add more milk to thin it out, but you can't remove milk once it's in! It's always good to have a little extra powdered sugar on hand just in case you add to much milk - that's how to fix it if it gets too thin!

Enjoy!

Raspberry Pie

My mother has been making this raspberry pie for as long as I can remember.  Every summer I look forward to fresh raspberries so I can continue the tradition of making this pie.  In fact, there really isn't any other raspberry recipe that I make.  This year the berries came out late, so I had to wait for what seemed like forever.  But they are here and you've got to try this recipe - I guarantee that, if you like raspberries, you'll find it tasty!!

I do have to admit that this particular pie was made by my mother - hey, we needed the pie for company and I didn't have time!  And after all, she's the one who taught me, right?!?
 
 
Raspberry Pie

1 qt. raspberries
1 1/2 cup water
1 1/2 cup sugar
4 T corn syrup
3 oz. box raspberry Jell-O

Pie Crust: mix the following and pat into a pie plate
1 cup flour
1 stick margarine or butter, room temperature
1/4 cup powdered sugar

Bake 10 minutes at 350 degrees.

Allow crust to cool a little and place berries in crust.

Mix sugar, corn syrup and 1/2 cup water.
Boil 1 cup water, add Jell-O and dissolve.
Add sugar/corn syrup mixture and mix to dissolve sugar.  Cool.  Pour over berries.

Refrigerate pie until solid.  Serve as is or with whipped cream.

Enjoy!

Summer Pasta

This is an amazing, fresh summer dish.  I love finding new recipes that I want to make over and over again and this is one of them.  In fact, I've already made it twice since discovering it less than two weeks ago!  And the best part is that it's so simple.

I got the idea for this recipe from a Barefoot Contessa recipe I saw on one of her shows.  I've changed the quantities and the cheese, but otherwise it's pretty much the same.  You can see her version here.


Summer Pasta

2 cups cherry or grape tomatoes, halved
1 clove garlic, minced
9 leaves fresh basil, julienned
1/4 tsp. crushed red pepper flakes (or more if you like it spicy)
1/4 cup olive oil
Kosher salt, to taste (about 1/4 - 1/2 tsp)
1/4 tsp. black pepper
1/4 - 1/2 cup mozarella pearls (or small diced)

1. Mix above ingredients, cover, and let sit at room temperature for 3 to 4 hours.

2. Boil angel hair pasta (1/2 - 3/4 pound). Drain when al dente, but don't worry about getting all the water out - a little bit left will help keep the pasta from being too dry.

3. Mix cooked pasta with tomato mixture and serve immediately.  It's extra delicious if topped with a little more fresh basil and parmesan cheese!

It's suppose to be tomato-heavy, so this will serve about 4 people, depending on appetites!

Enjoy!

Cherry Rhubarb Crisp

I was contemplating how I could use the rhubarb (yes, I still have more) and remembered my friend, Katy, talking about making a rhubarb cherry dish for dinner the other night.  I hit the internet to see if I could find her recipe.  I couldn't.  But what I did find was quite a few recipes for Cherry Rhubarb Crisp.  I figured it was worth a try.


What I've done is combine a few elements of different recipes, and I think the outcome is delicious; as did the friends with whom I shared the dish at a 4th of July BBQ.  We served it over a little vanilla ice cream and the combo of sweet and tart was perfect.  I'd highly recommend you try this dish as soon as possible!

I would also recommend investing in a cherry pitter if you don't have one.  I didn't have one so I pitted the cherries by hand; I had the red fingers to prove it.  :)


Cherry Rhubarb Crisp

3 cups rhubarb, diced
2 cups cherries, pitted and halved (sweet cherries, not pie cherries!)
2/3 cup sugar
1 T corn starch
3/4 cup oats
1/2 cup brown sugar
1/4 tsp. ginger
1/4 tsp. cinnamon
pinch of salt
1/4 cup softened butter, in pieces

1. Mix the fruit with the 2/3 cup sugar and the 1 T corn starch. Let stand.  Changing quantity combinations is okay, if you prefer more cherries to rhubarb.

2.  In a separate bowl, combine the rest of the ingredients. Use hands or a pastry cutter to mix in the butter until the topping is in large crumbles. (I found using my hand worked much better than the pasty cutter).

3.  Pour fruit into an 8x8 dish. Top with topping mix and bake at 375 for 35 minutes, until bubbly and golden brown.


Enjoy!

Rhubarb (Strawberry) Custard Pie

As I told you last time, I'm sharing more rhubarb recipes!  This time it's for a pie my mother has made for as long as I can remember, rhubarb custard pie.  It's a simple pie to make, especially as rhubarb is so easy to prepare, and easy to love.  This time, I decided to try a little twist on the recipe: I added strawberries. 
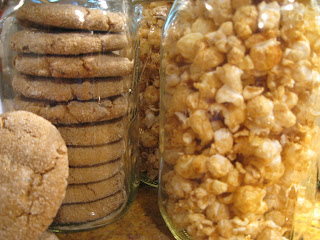
It took two tries to get this pie right.  The first time through, I added strawberries to the recipe and waited to see how it worked.  It was quite runny.  For the second try, I increased the amount of flour and it turned out perfect!

I hope you find it delectable, with or without strawberries!


Rhubarb (Strawberry) Custard Pie

1 egg, slightly beaten
1 cup sugar
6 T flour
1/2 cup water
1 T melted butter
2 1/2 cups diced rhubarb
3/4 cups diced strawberries
1- 8inch pie crust - recipe below

1.  Mix the first 5 ingredients together to create the custard. Mix the water in last so the flour doesn't clump. Let stand while you prepare the fruit and pie crust. 

2.  Create a pie crust. This pie is traditionally served with one crust (lower), but if you're really into pie crusts, you can put a top on it as well, just be sure to cut venting holes in the top!

3.  Dice the rhubarb and strawberries.  I prefer smaller pieces, so I slice each rhubarb stem in half length-wise before dicing, and cut each strawberry into 4 or 8 pieces, depending on size.

4. Mix all fruit together and pour into a prepared pie crust.


5.  Mix custard one last time and pour over fruit in the crust.

6. Bake at 375 for 45-60 minutes, until the crust is just golden brown and fruit isn't jiggly.

Enjoy! 


If you'd like to make this recipe without the strawberries, follow all steps the same, but decrease the flour to 3 tablespoons and increase the rhubarb to 3 cups.  To make the recipe for a 9" pie pan, multiply all ingredients by 1.5.  To make it for a 10" or a deep dish pie pan, double the recipe.

9-inch Pie Crust

1 c. flour
1/2 tsp. salt
2 T ice water
1/3 + 1 T crisco

1.  Combine flour and salt in a bowl.

2.  Cut in shortening with a pastry cutter.  Sprinkle water as needed until dough sticks together.

3.  Lightly flour a flat surface, or place ball of dough between two sheets of wax paper (easy clean up!)

4.  Roll dough out to two inches larger than inverted pie pan (I use this recipe for an 8-inch pan and just keep the crust slightly thicker).

5.  Place pie shell in pan and fit the crust down into the corners of the pan.  After folding the edges over the filling (I've never been able to nicely crimp edges of a pie crust), I like to sprinkle a little sugar on the edge of the crust for extra sweetness!

If you want a top crust as well, just double this recipe.

Rhubarb Cake

'Tis the season for rhubarb!  I know, I know - rhubarb season started a long time ago; but it's still going on and I'm in the midst of harvesting my second cutting, so I thought I'd share some of the great recipes I've discovered.  This first one (yes, look for future rhubarb postings!) is a new one to me this year.  My dear friend Carolyn shared this recipe; it's a cake her mother made when she was growing up, and I'm excited to be able to pass it on to you!

I have to admit that I was skeptical of rhubarb cake when I first heard of it.  Up until now, I'd only had rhubarb crisps and pies.  But one taste was all it took - I was a convert!  The crispy brown sugar topping adds just the perfect touch of texture and sweetness.  Now I almost prefer it to pie. 

I made this particular batch at my parent's house this weekend (can you believe they hadn't even harvested their first batch of rhubarb?!?  Something had to be done!).  I took advantage of the beautiful day to snap an outdoor picture!


Rhubarb Cake

1 c. buttermilk (set aside - buttermilk substitute recipe below)

2 c. diced rhubarb
1/2 c. sugar

(mix and let stand)

1/2 c. softened butter
1 1/2 c. sugar

(cream together)

Add one egg to the creamed butter and sugar.

2 c. flour
1 tsp. baking soda
1 tsp. cinnamon
dash of salt

In a medium bowl, sift dry ingredients together - I whisk!
Add dry ingredients to butter, sugar and egg mixture.

1 c. buttermilk
1 tsp. vanilla

(add to rhubarb)

Add rhubarb and buttermilk mixture to the flour and butter mixture and blend all completely (I use my Kitchen-Aid and it works perfect!)

Pour into a 9x13 pan and bake for 30 minutes at 350 degrees. 
Sprinkle on topping evenly and bake another 30 minutes.

Rhubarb Cake Topping

1/2 c. brown sugar
1 tsp. cinnamon
2 tsp. softened butter
2 T. flour

Mix with pastry blender or fork.

Buttermilk Substitute

Place 1 T. lemon juice or white vinegar in a liquid cup measurer (I actually used cider vinegar as we didn't have lemon juice or white vinegar and it worked just fine). Fill with milk up to 1 cup line.  Let stand for 5 minutes, then use as recipe requests


Rhubarb cake is also a great way to use frozen rhubarb (if you're like me, you can never eat it all in time). Last time I tried using frozen rhubarb to make a cake, it was very flat and mooshy; apparently rhubarb looses any sense of shape when frozen. Fortunately, rhubarb cake doesn't need rhubarb to hold it's shape, so now I have a great recipe to bring back summer in the dead of winter - as well as enjoy when fresh! (Disclaimer: Although I haven't tried it with frozen rhubarb yet, I'd probably recommend draining the thawed rhubarb or the cake will probably not set properly.)

Enjoy!

Caramel Corn & Ultimate Ginger Cookies

When it comes to food and my dad, there's a few things that quickly come to mind: one is making caramel corn with us when we were kids, and the other is his love for ginger.  I remember making caramel corn well, not just because of the delicious reward, but mostly because it took a certain amount of pain; separating the hot, sticky pieces always burned my fingers. I'm glad to report that as an adult, it's much more tolerable and not nearly as painful as I remember!  It's also surprisingly simple.

Caramel Corn

2 c. brown sugar
1/2 c. butter
1/2 c. corn syrup
1 tsp. salt
1 tsp. baking soda
7 1/2 quarts popped popcorn

1.  Pop popcorn and divide between two paper bags - I use grocery bags.

2.  Boil the first 4 ingredients for 5 minutes, reduce heat but keep boiling.

3  Add: 1 tsp. baking soda (keep your eye on the caramel as it will really puff up with the addition of the baking soda!) Stir baking soda into caramel.

4.  Pour 1/2 of caramel over popcorn in each bag.  Quickly stir as much as possible with a wooden spoon - be sure to stir the bottom and corners.

5.  When caramel stops coating popcorn easily, roll top of bag over and place in microwave for one minute.  Stir again. Repeat one or two more times until popcorn is evenly coated. Be careful not to microwave too many times or the caramel will burn.

6.  When caramel is evenly distributed on the popcorn, pour into a wide, shallow bowl and break clumps up with your hands to create separate pieces of caramel corn. Be sure to store leftover caramel corn (if there is any) in an airtight container to prevent it from going stale.

Enjoy!


As I mentioned before, my dad has a love for all things ginger.  His Christmas stocking always has ginger candies and other ginger delectables.  I've had a recipe I found in a Barefoot Contessa cookbook that I've been dying to make for him.  He came over on Sunday so I took the opportunity to try out the recipe.  The results?  He said it is quite possibly the best cookie he has ever had.  My mother-in-law happened to stop by during the baking and tried a cookie.  She called back the next day and asked if she could have a few; when she heard there weren't many left, she figured she'd be happy if she could have just one more.  I guess they really might be the Ultimate Ginger Cookie.

Ultimate Ginger Cookies

Here's the recipe: Ultimate Ginger Cookies

I find the best place to find candied ginger is the bulk section of your grocery store - it's much more affordable than in the spice aisle!  I also made the cookies slightly smaller (using a small icecream scoop) and got about 25 normal size cookies out of the recipe.

Tacos

I know.  You're thinking that everyone already knows how to make tacos.  Well, the fact that they're so easy is half the reason they're so great!  These are a lower-cal version of your typical taco - but full of flavor, so don't stop reading just yet.  They're also a little unusual because they are made with elk meat.  Elk meat is a great substitute for beef, and much leaner.  Of course, you can always use a lean (I like less than 10% fat) ground beef if you can't find elk meat.  I was a little disappointed at first that I didn't have cheese or sour cream, but the lime really gave them a fresh, zesty flavor and I didn't miss the cheese or sour cream. They'd be even better if you topped them with fresh avocado.


Tacos

1lb ground elk meat
1 taco seasoning packet
1 tomato, diced
1/2 yellow or orange bell pepper, diced
4 Tbs. chopped cilantro
1/2 lime, sliced

1. Brown the elk meat and season according to package instructions.

2. Chop vegetables and assemble your taco as desired.

3. Squeeze lime juice generously on each taco.

4. Enjoy!

Makes about 6 tacos.

Couscous Salad

I love shopping at the Metropolitan Market.  Especially when it's prime shopping time; that's when they have someone cooking up samples! And handily, they have recipe cards of whatever it is they're cooking up should you want to try it at home, which is almost always.  One of the recipes I picked up was for a couscous salad.  With summer coming, I thought it would be perfect timing to share this simple salad that can work as a side dish at a picnic or as a main dish on a hot summer day!

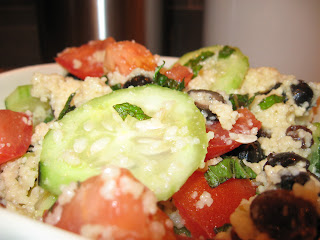
We had it tonight, and, to give credit where credit is due, my husband cooked.  Here's a few things we changed in the recipe: the cucumber wasn't seeded (evidenced in the picture!), we used a can of sliced olives and only 1/4 cup of olive oil (it originally called for 1/2 a cup). It turned out great! 


Couscous Salad

1 cup couscous, cooked
juice of 4 baby lemons
1/4 cup olive oil
1/2 cup mint, minced
1 cucumber, peeled and seeded
2 tomatoes, chopped
16 black olives
1/4 cup raisins
1 avocado for garnish

1. Prepare couscous according to package directions and chill.

2. In a large bowl, combine olive oil, lemon juice, and mint. Season with salt and pepper to taste.  Toss in prepared couscous.

3. Dice one of the tomatoes and cucumber; add to the couscous along with the raisings and olives. Toss gently.

4. Line serving bowl with the couscous salad. Slice the remaining tomato and the avocado in wedges to garnish.

Serves 4 (3 if it's the main dish for dinner!)